iPad drawings
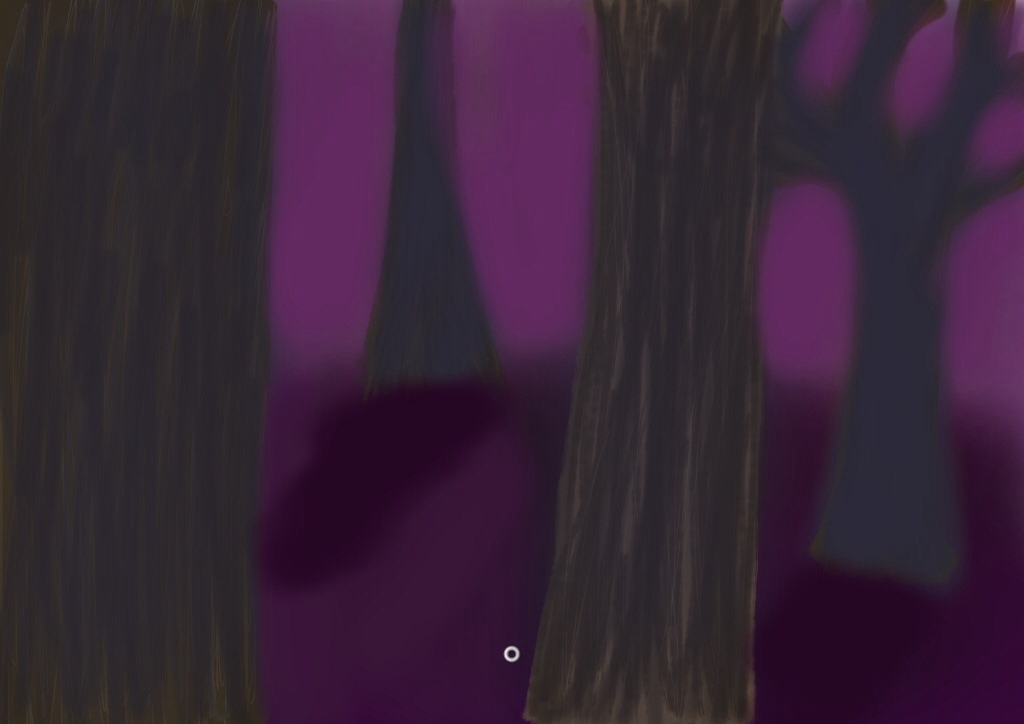
While creating this iPad drawing I had to use a lot of techniques. For example you need to draw the sky and ground before you draw the trees. Another example is you need to make the trees all at different distances to make it seem more realistic. As well as doing all of these things you need to use the correct colors to make it a spooky tree ipad drawing, which was the assignment.
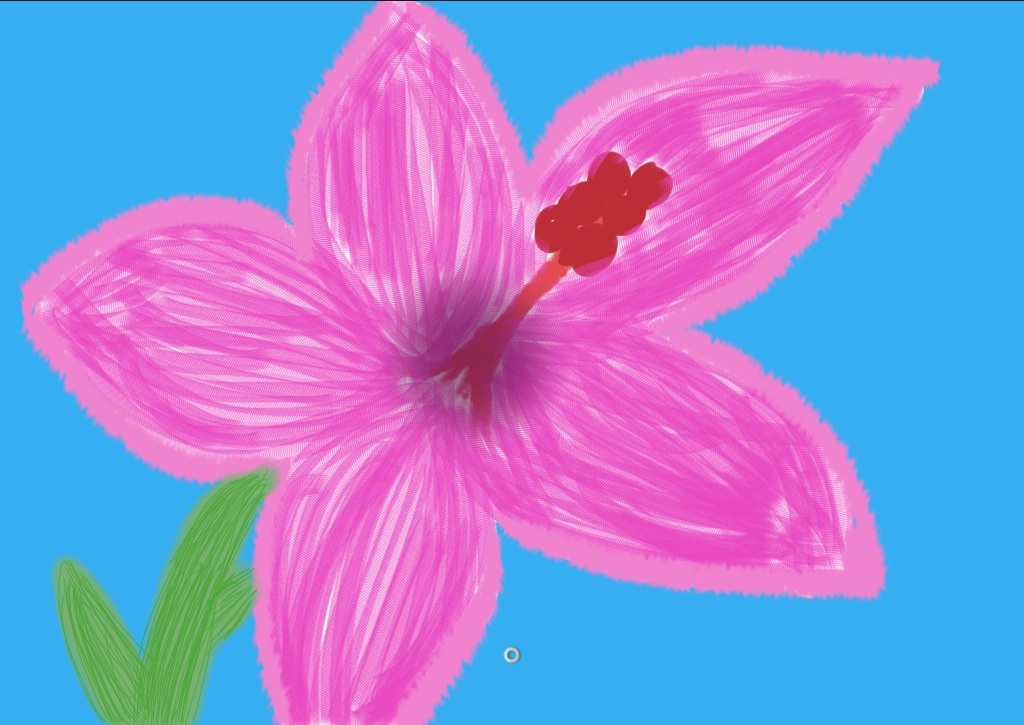
This is the drawing I made on an iPad for the first time. The assignment was to explore the different types of tools that I could possibly use. I think that I did that because I used small, big, rough and shady tools to create this flower.
Clay box
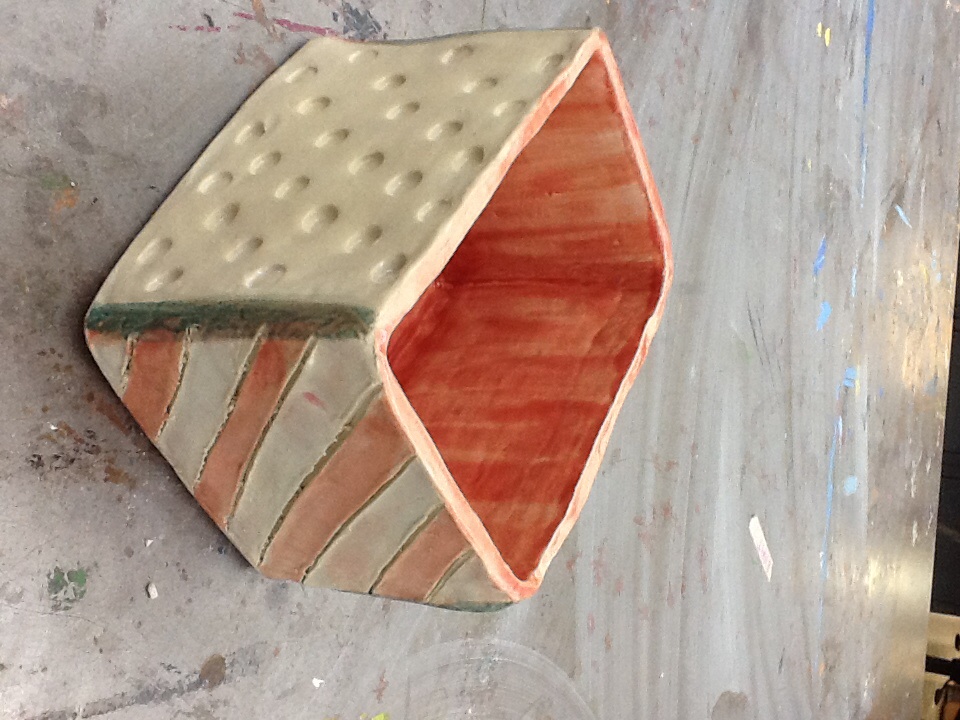
This is my finished product of my clay box. Overall I am happy with it because it stayed together and looks very smooth. The one thing I do like about it is the glaze because the colors are a little boring. But in the end my clay box is very good.
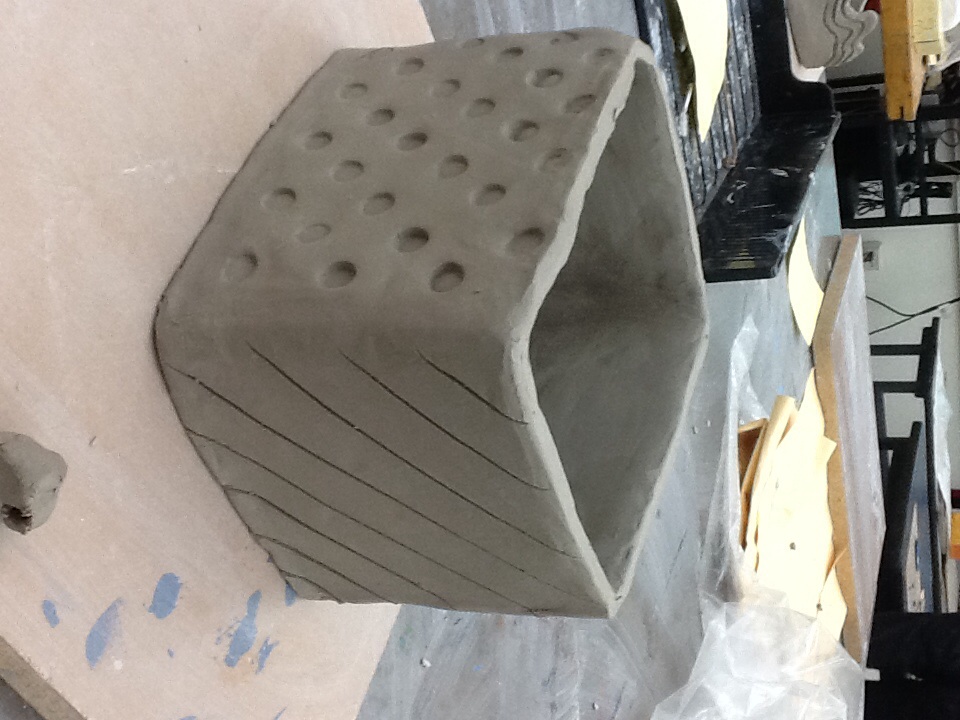
In order for this box to stay together I used a score tool and some slip. I still need to smooth it a little more and put final touches on it. Adding designs was easy to me but making two 45 degree angles was hard and confusing.
clay cup
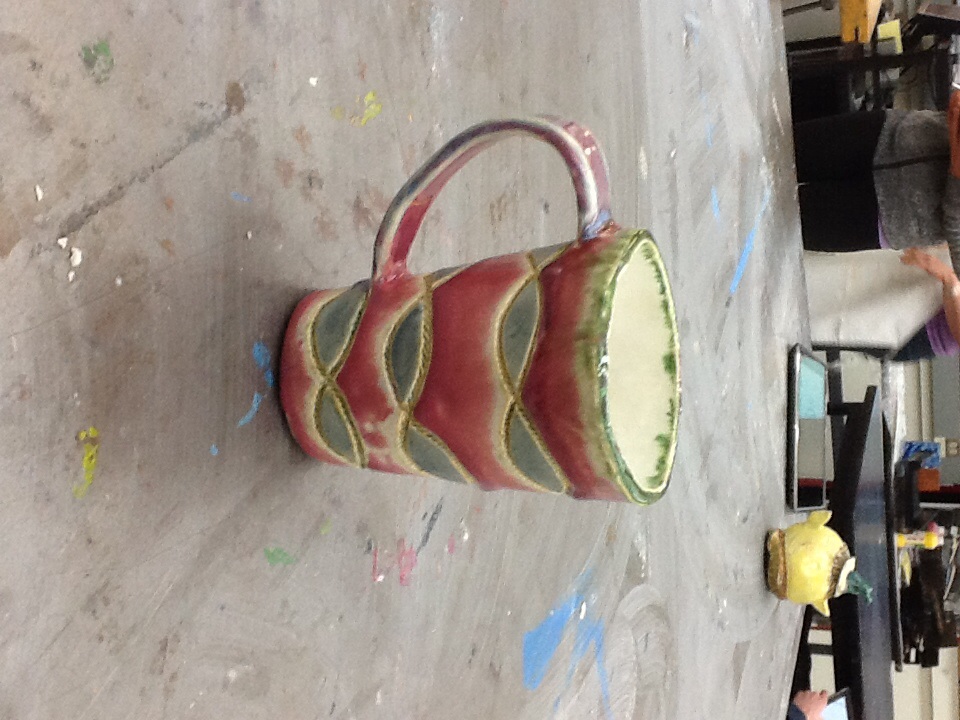
The cup came out as a pretty good cup. It stayed intact and did not explode or break. To get the result I did I had to do a lot of smoothing. While making this I learned that you need to add a lot of glaze onto the cup in order for it to have enough color after the firing.
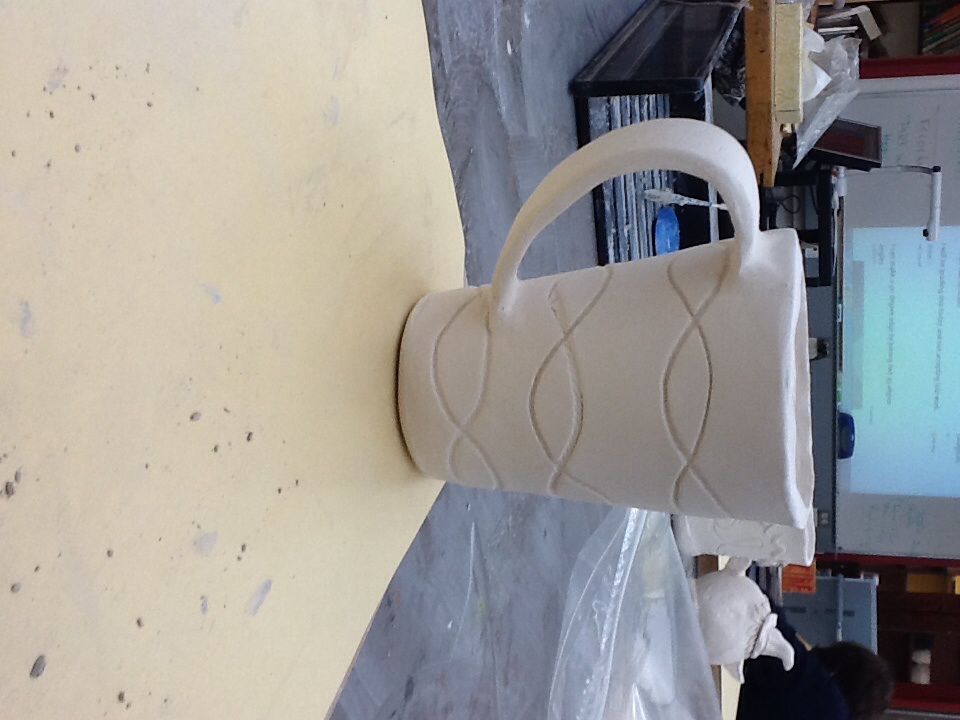
The cup came out pretty good. It's very smooth and stayed together as well. I am very happy with this cup, and I'm very excited to glaze it and see the finished product. During this proses I learned that your clay need to be very smooth in order to not have any sharp pieces.
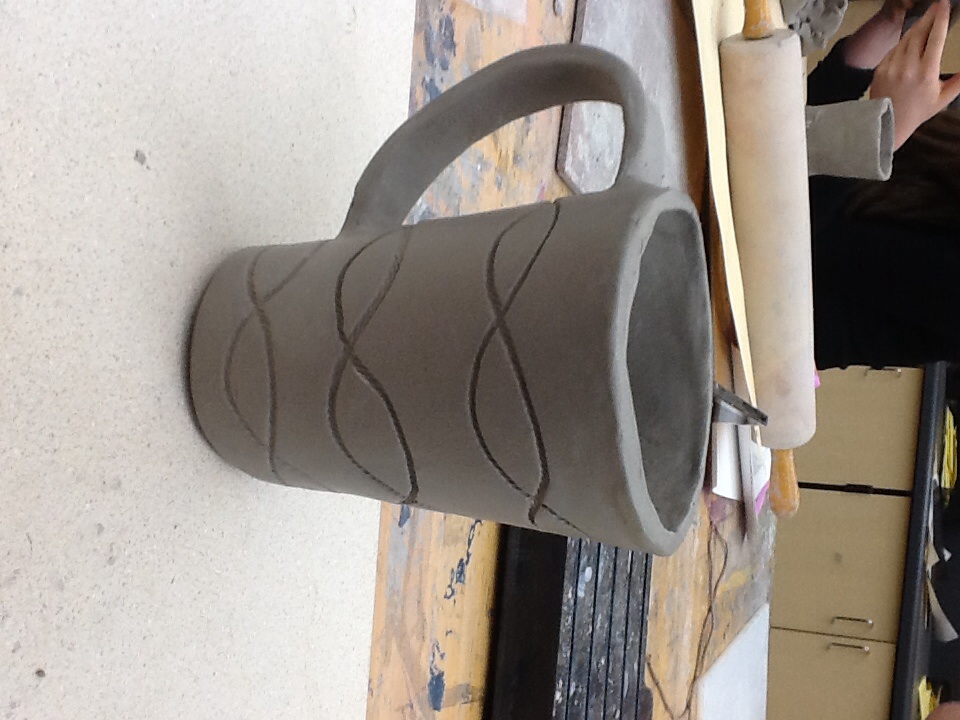
When I was creating this cup I was thinking about making a simply, yet pretty cup. And I think that with the design I used, I accomplished that goal. While making this I learned that you need to attach things really good so they won't fall off.
clay mouse
5 I can create a clay project of uniform thickness; with sculptural details that are also of uniform thickness so it will dry, handle, and fire without breaking.
5 I can slip and score and securely attach clay to clay so that it stays attached.
5 I can create a unified sculptural form with a details of interest on all sides and the top of the project.
5 I can design in three dimensions by using three dimensional details (not linear ones) these 3D forms will create designs with shadows and highlights.
5 I can design and create a unified form where the surface design and all sculptural details will enhance the whole by reflecting or contrasting with the form.
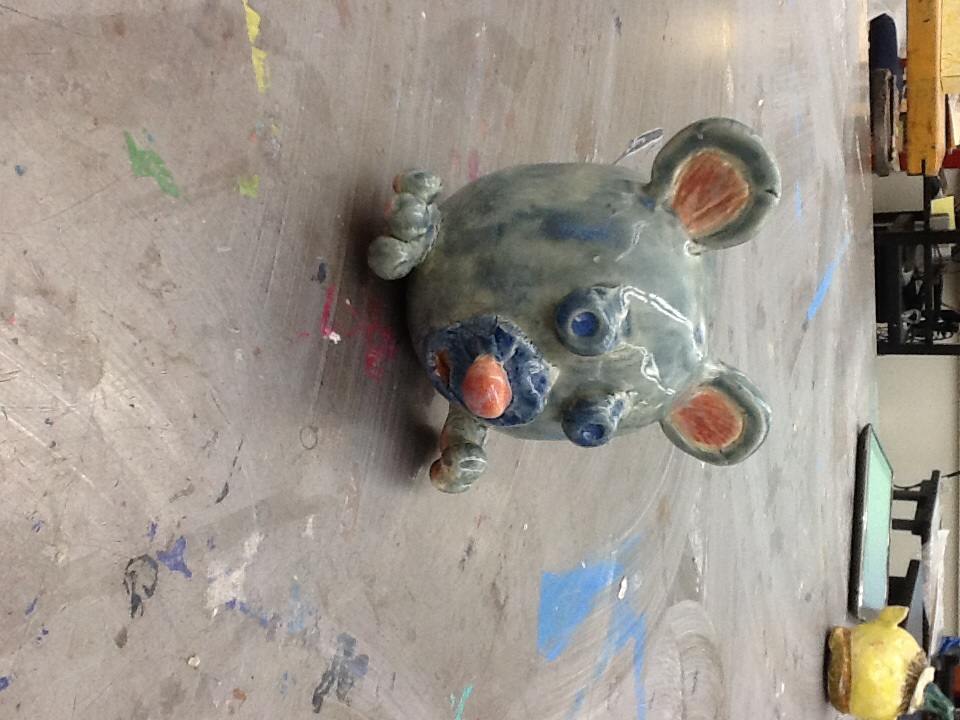
This is my finished product. I am pretty happy about it. The only thing that I'm not happy about is that it's whiskers came off, but they were very thin and small, so I guess I should of expected that. But I really like the glaze.
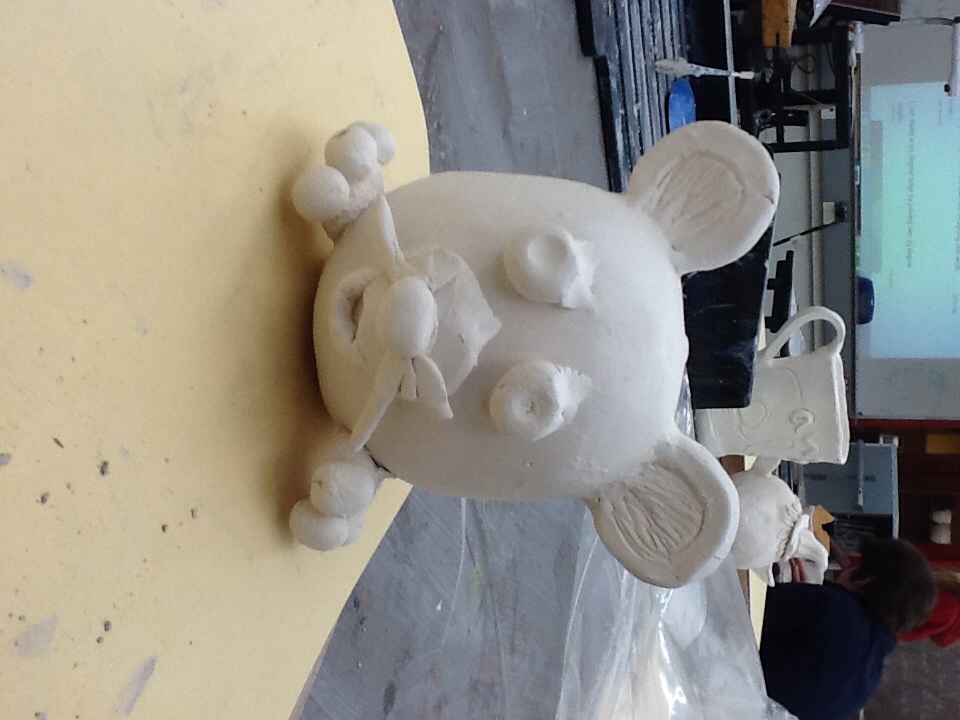
This is my half way done pinch pot. I am happy about everything except the whiskers. But I guess it's okay if the mouse doesn't have whiskers. Also the spots where I blended the clay to the other clay looks really weird and I wish I did a better job at that. Overall I'm excited to glaze it.
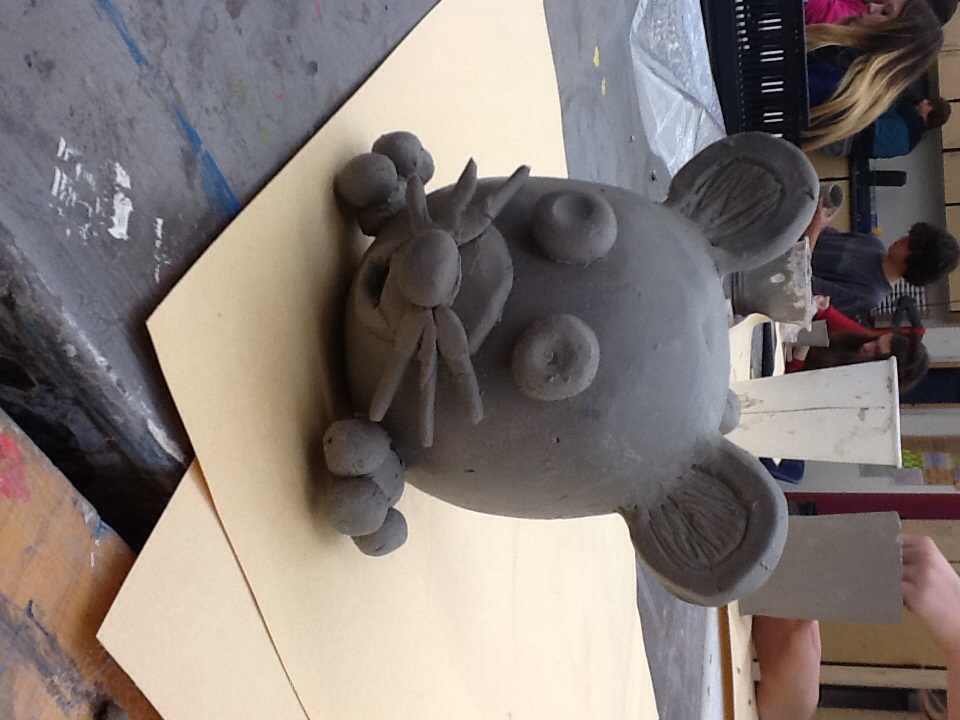
This is my clay pinch pot. It is a mouse. I think that I did a very good job on this and I am so excited to see what it is going to look like at the end. While making this I learned how to simply use clay. I also learned how to make this realistic by adding detail to the entire object, front, sides and back.
Face painting
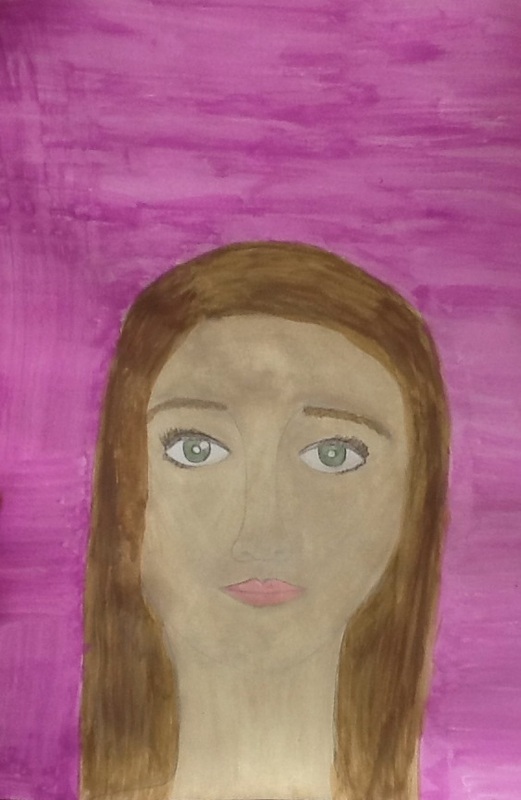
This is my painted face painting. While creating this I learned that shadowing is key. I am not super shire on how to do it so mine is not as good as I would like it to look. The art elements used were a ruler, a pencil, paper, paint brush, and paint. The new skills I have gained is how to make a face look real and shadowing. The feeling of this painting is a single girl because that's all it to edit.
I can draw a face with the correct proportions – head shape & feature placement 4
I can draw features the correct size in relation to each other and the head 4
I can create the illusion of three dimensions by drawing around the surface of the face to create the form of a head 4
I can indicate light by using a scale of values for shadows and highlights 4
I can draw with the pencil and not smudge so I create clear textures for skin, hair and any other details 5
Face drawing
I can re-sketch my pencil drawing for a painting with the correct proportions – head shape & feature placement. 4
I can softly define features with the correct size in relation to each other and the head. 4
I can create a unified image with a sense of emphasis on the face or part of the face. 4
I can indicate three dimensions by using complementary colors for shadows and highlight. 4
I can paint with defined brush marks so I create clear textures for skin, hair and any other details. 4
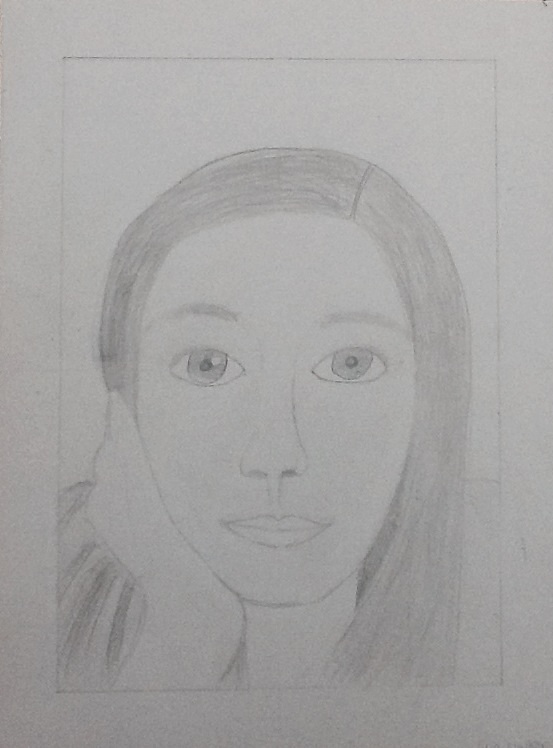
This is my realistic face drawing. While creating this drawing I learned that it is really important to make each body feature with relative size in order to make the face look real. The art elements I used was a pencil, an eraser, paper, and a ruler. The theme or mood of this is a girls face. That is the theme because that is simply all it is, a girls face.

Face drawing
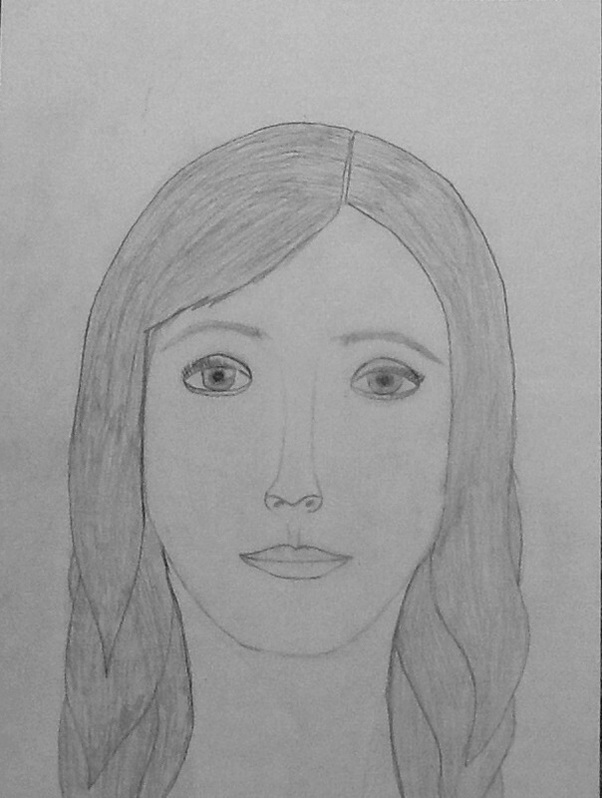
This is my face drawing. I also drew a scull drawing. Throughout my experiences while drawing this face, I have learned that when drawing a face I need to measure different features differently. This means that for example there needs to be more space under the mouth and less above. Or that your eyes need to be one eye apart. But over all I had fun time creating a face.
Scull drawing
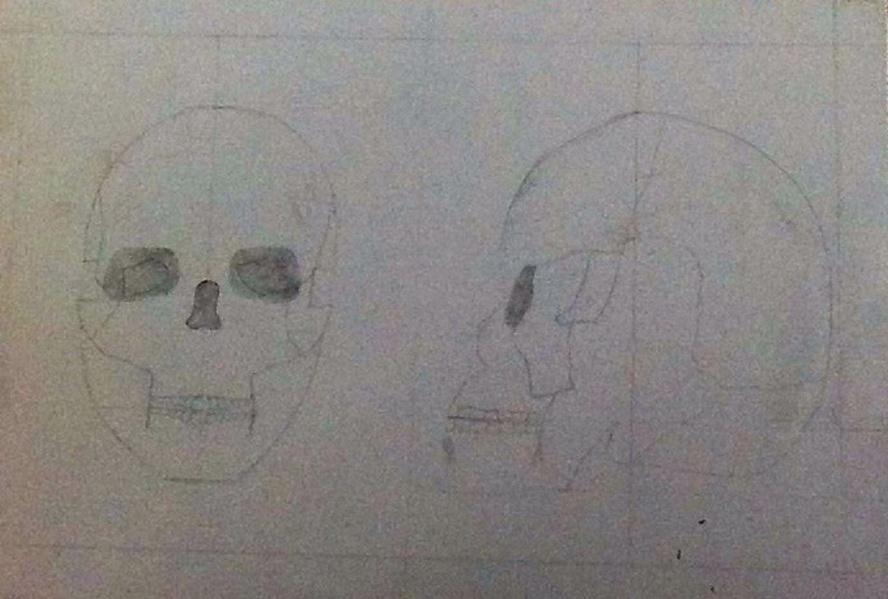
This is my scull drawing. While creating this drawing I learned where different things are place in the human face. For exampleI learned that our eyes are placed in the center of our face. I think the drawing looks like a realistic scull but it could defiantly use some more detail in it.
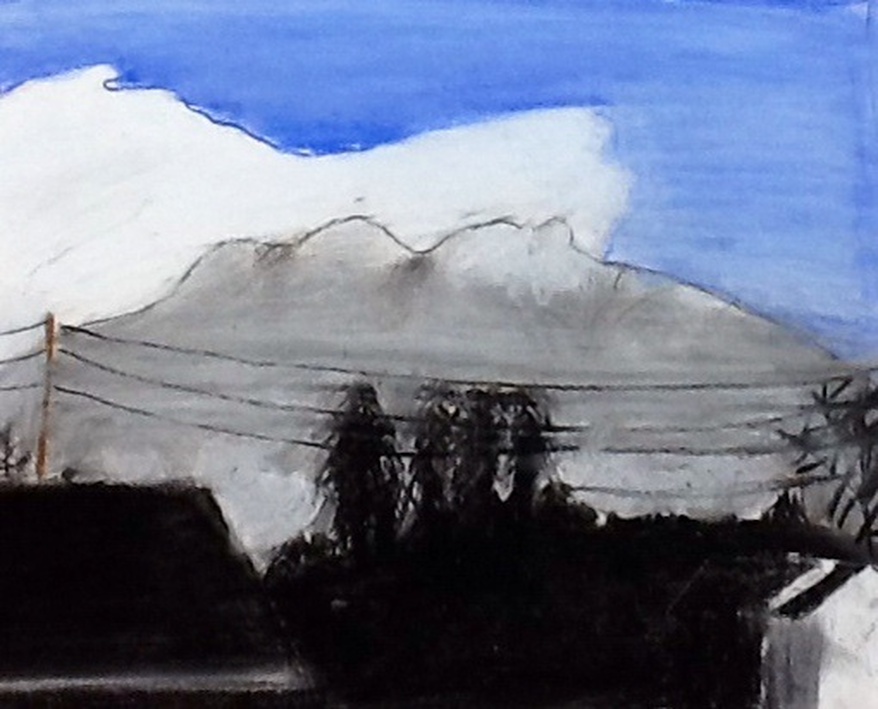
Mountain drawing
For this project I created an impressionistic drawing. So basically I took two picture of two totally different landscapes, and then drew them using chalk. I also ended up learning new art skills, including shading and blending. For example I needed to blend the sky. The art elements used while making this included pencil, ruler, eraser, paper and chalk. The feeling of this is a soft cold winter because it shows a beautiful blue sky, and the sun shinning just on the mountain.
Rubric
Website: 5
Foreground, mid-ground, background & sky: 4
Relative size, overlap and value changes: 4
Complementary colors: 5
No smudge: 4
Website: 5
Foreground, mid-ground, background & sky: 4
Relative size, overlap and value changes: 4
Complementary colors: 5
No smudge: 4

Chair and water drawing
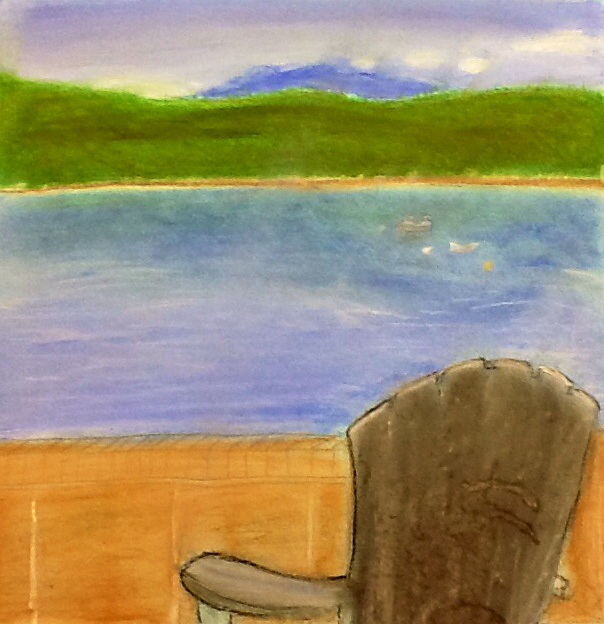
This is my chair and water chalk drawing. I think that it defiantly looks like the picture and I am happy with the results. The only thing I don't like is that my paper started to peal and now it looks a bit funny. But, while creating this I learned to blend colors and use shadows.